Well here we are today blogging about buttons.
Got sick of my jacket and the colours of the buttons so decided to give revamping a go.
I really like turning the old/cruddy into the new
So this is what I had before:
This is what I turned it into after:
There is a high possibility that I may get sick of the button colours but even so I think it looks way better than before.
Monday, 31 May 2010
Monday, 10 May 2010
Macarons!
Hmm so I had previously eaten loads of macarons while in Europe, watched the MasterChef episode on the Macaron challenge, helped out with piping of macarons but had never made macarons myself before.
So for Mother’s Day I thought it was timely to give it a go. With book in hand (thanks to my friend who gave it to me for Christmas) I picked a basic vanilla macaron biscuit and decided on a cherry buttercream filling.
I have to say man this recipe requires patience. The whipping of the egg whites and making of the biscuit mixture was pretty simple but I had to make sure I followed the recipe precisely because getting it right determined whether or not you got that macaron base.
So when I put them in the oven and glanced at them 10mins later, I was elated to see that the base had formed! It was a bit strange though as the top of the biscuit slid from the bottom, however that was fixed with a few more minutes in the oven.
With biscuit done it was time to get onto the butter cream filling. I’d made butter cream before for other cake recipes, but this one involved an entirely new technique. After a gazillion hours of whipping the butter and looking at all the other ingredients curdle, I thought instant fail. However, after some more persistence (the recipe said keep going) the butter cream looked a bit better but was certainly not the thickness in consistency that I expected. I decided to have some macarons with butter cream filling and the rest of it cherry. The cherry filling looked foul and I wasn’t certain whether it was edible and worth feeding to the family (I did not need food poisoning on this day). But again I kept mixing and in the end the cherry butter cream tasted quite nice.
Assembling the macarons was fun, well not fun but I enjoyed seeing the final product. It actually looked real!
Although some did looked quite deformed, but all in all I thought it wasn't too bad for a first try.
Would I make this again? Oh yes I would, it was actually yummy to eat and they all disappeared quite quickly. I just need to improve my piping skills (atrocious), butter cream making skills and avoid overcooking things.
Lessons learned: butter cream, patience, piping
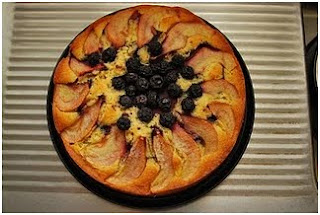
Pear and Blueberry Torte
This is probably one of my favourite looking cakes. I had previously heard of the word torte to describe cakes but I hadn’t actually remembered what they looked like.
So for my sis’ birthday I decided to bake her this cake, something that was not too sweet and definitely not chocolate as she rarely ate anything sugary.
It was definitely one of the easier recipes to do (I think I modified the recipe slightly and added an extra egg), but the key to this was getting the presentation right. The cake still looks a bit wonky, but hey that’s what you call art, something you make up!
Lessons learned: torte, more baking skills
Accordian Frame
A colleague of mine is a keen scrapbooker. So it’s no wonder I had to try my hand out at this craft. I still remember one of the first things she had said to me… ‘it’s addictive’. Of course I didn’t believe a word of it until I bought some paper, then some tools, then a whole kit, then some more tools and yes you get the point.
I decided to make this frame as it was relatively simple and something that would give me some practical experience before making my friend’s wedding album out of similar materials.
It was pretty simple to make (except for one small mistake which you cannot see) and gave me a good grasp of the basics of scrapbooking.
Lessons learned: embellishments, paper choices
Clutch Handbag
I had previously gone on a book buying rampage which included a book on handbags. So as part of exploring different crafty things, I decided to give handbag making a go.
Since it was my first attempt, I wasn’t keen on buying special material in the event that it turned out a disaster. So instead I sourced the materials from the stash that I had sitting around at home and chose black corduroy. It was something that would still look ok and would match most things that I wore.
Following the instructions in the book and 2 reattempts at fixing the top corners of the inside of the handbag (make sure you cut your patterns correctly!) I was able to conjure up this item in a short space of time. I actually thought it would take longer but it turned out a lot easier than expected.
The next step was to dress up the handbag, so I decided to create some sort of flower design. After reading some blogs I used some pretty ribbon I had bought previous and cut up an unused scarf. With some tricky hand stitching I whipped up the flower. It’s probably not exactly what I wanted (given the constraints on the materials available at the time) but it still looked reasonable enough for my first try.
Overall, it was quite a lot of fun making the handbag. I managed to learn some new sewing skills which I can now talk about with my fellow crafty enthusiasts. I will definitely make more handbags again, but only after I finish the scrapbooking piece that needs to be done for my friends wedding!
Lessons learned: sewing, topstitching, flower making
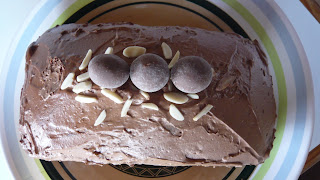
Lemon Layer Cake/Devil's Food Cake
Lemon Layer Cake
Devil's Food Cake
These cakes were made as part of the frantic Christmas celebrations last year. I’d previously been baking an assortment of other cake/bread recipes (baked banana bread around 8 times purely cos my brother decided to buy a box of bananas thinking that 3 people could actually finish it all) but thought I’d try something a little more grand for the festivities.The Lemon Layer Cake was the simpler of the two to make as it had fewer components to the recipe. Both cakes took a few hours to prepare and bake, but the outcome was certainly well worth the effort!
Lessons learned: patience
Cupcake Pincushion
Well this was one of the earlier pieces of work that kicked off my craft/cooking/scrapbooking phase. The inspiration for this came from walking past a sewing shop and seeing the cute cupcake pincushions. However, soon enough shock horror set in when I noticed the price on those things! I mean yes they look good but are so not worth the price (you may notice that most things I make/do are a result of these discoveries, I refuse to be ripped off).
Making the item itself was interesting as I had trouble sourcing the cupcake mould base and had to search long and wide to get a hold of the right size (of course knowing my luck once I had found them, not long after I just kept spotting them everywhere I went).
I also had to have a good think about how to put the pincushion together, I’d seen some blogs on how to do it but I didn’t want to go to the lengths of getting all these additional materials (I’m also quite insistent on making things with what I have). So after rummaging around the house I located some materials and set off to put the thing together. This experience enabled me to try my hand at machine embroidery (unfortunately I did not master it that well on first try) but it was fun and certainly something I'd try again in the future.
Lessons learned: embroidery
Subscribe to:
Posts (Atom)


